When installing a fiber optic network, appropriate fiber optic termination is considered to be an extremely important part since it can affect the performance and reliability of the whole network. It is hence natural that much attention should be necessarily attached to this area nowadays. Besides, an increasing number of products concerning fiber optic termination are appearing on the market to make the termination task easier and more accurate. The article will make an overview of fiber optic termination.
Generally speaking, fiber optic termination acts as the connection of fiber or wire to a device, the device can be something like a wall outlet or equipment that allows for connecting the cable to other cables or devices. Based on this, fiber optic termination enables fiber cross connection and light wave signal distribution. Proper fiber optic termination is able to meet the demand for protecting the fibers from dirt or damage while in use and preventing excessive loss of light as well, which also contribute to smooth and efficient performance of the network.
Before performing fiber optic termination, one should get well-prepared to ensure a smooth and successful process of termination. The preparation for fiber optic termination involves several steps: gathering the supplies you need, stripping the outer jacket, cutting the kevlar, and stripping the buffer or coating. For supplies, you’ll need safety glasses, a fiber disposal bin, connectors, fiber optic cable, epoxy and syringes (or anaerobic adhesive), and polishing film. Tools used in fiber optic termination usually include fiber stripper, scribe, aramid yarn scissors, adjustable cable jacket stripper, polishing puck, polishing glass plate, and a rubber pad to polish the PC connectors, especially for single mode termination. Besides, You’ll also need to test equipment such as a power meter, FO tracer, reference test cables, a LED light source and a microscope to view the connector.
It is commonly believed that fiber optic termination is often time-consuming and highly specializes. However, due to the continuous advancement in termination technology, fiber termination systems currently demand less training and produce higher quality fiber connections in less time.
Basically, three widely adopted fiber termination methods are available to operators: pre-polished connectors, epoxy and polish fiber termination and pigtail connectors.
Pre-polished connector has a short length of fiber already installed into the ferrule by the manufacturer of the connector. Moreover, the manufacturer also polished the ferrule end face thus there is no need to carry out this step on-site. The fiber to be terminated must be prepared using a specialist cleave tool and inserted into the rear of the connector where an index matching gel is often used to bridge the gap between the two fibers. The terminated fiber is held in place using some form of crimp or locking mechanism on the rear of the connector.
This type of connector requires the application of some form of epoxy (glue) between the fiber and the connector ferrule that firmly bonds the two elements together once the epoxy has dried. There are a number of different types of epoxy available:
Heat Cured Epoxy — uses some form of “oven” to cure the epoxy, which can be selected for the optimum performance within pre-determined temperature ranges. The epoxy may either need to be injected in to the ferrule by the technician or the connectors may be supplied with the epoxy already injected by the connector manufacturer.
Ambient Temperature Epoxy— cures at room temperature without the need for any power, making it suitable for on-site terminations.
Fast Acting (Anaerobic) Adhesive — use an accelerant to speed the curing time. It can cause problems if the technician is unable to complete the insertion of the fiber into the ferrule before the epoxy cures.
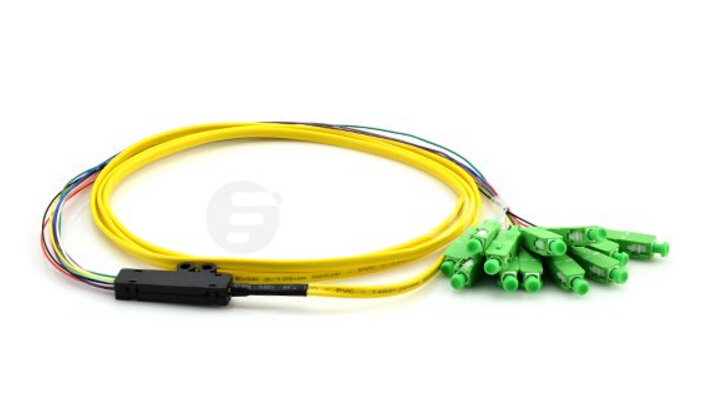
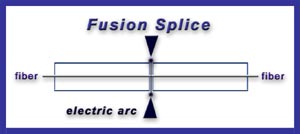
Splice-on connectors are an alternative to either the pre-polished connector systems or the epoxy method of termination. A pigtail is a short length of 900 micron buffered fiber that has been factory terminated with a fiber optic connector. Thus it eliminates the need for any on-site termination or polishing of the connector. Splicing the end of the fiber of the pigtail to the end of the fiber of the cable, the pigtail is then attached to the cable. Fusion splicing is a preferred splicing method, where the two fibers are melted together using a high powered electric arc, forming one, single, continuous strand of glass.

Fusion splicing often requires the use of precision fiber cleaving tools and a fusion splicing machine. The fusion splice machine is used to align the two fiber end faces automatically and fuse the two together to create a very low loss joint.

Since fiber optic termination is an indispensable part of the optical network installation, we should always keep in mind the importance of it and get fully prepared before performing the task. Moreover, selecting a proper and efficient termination method could also help to ensure the excellent performance of the network.


